Contents
ToggleWhy Take a Screenshot?

Screenshots are versatile tools used in various situations, including:
- Capturing Visual Content: From saving a funny tweet to preserving an important email or visual, screenshots allow you to capture exact screen data without needing to copy and paste text.
- Troubleshooting and Documentation: Screenshots make it easy to document bugs or errors, simplifying technical troubleshooting.
- Creating Tutorials or Guides: Screenshots help illustrate steps clearly in visual tutorials or guides.
Screenshots on Windows Laptops
Windows provides multiple methods to capture screenshots, with some methods saving directly to the clipboard and others storing the file on your hard drive.
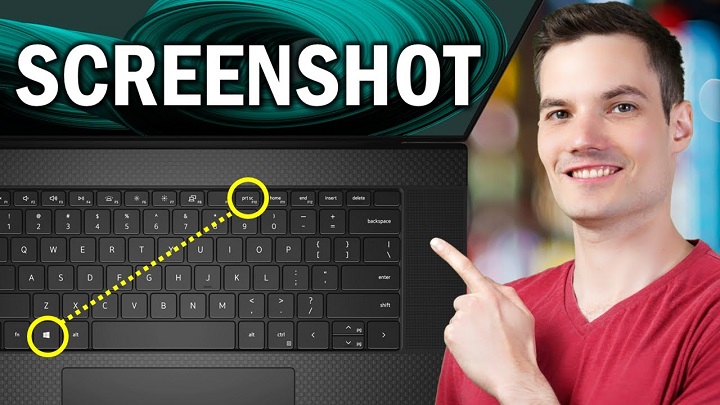
Using the Print Screen (PrtScn) Key
The Print Screen (PrtScn) key is often labeled as “PrtScn” or “Print Screen” on the keyboard and provides several options for capturing screenshots.
- Full-Screen Screenshot: Press PrtScn alone to capture the entire screen and copy it to the clipboard. Open an app like Paint or Word, then press Ctrl + V to paste it.
- Direct Save (Windows + PrtScn): Press Windows + PrtScn to capture and save the entire screen as an image file automatically. The image will be saved in the Screenshots folder inside the Pictures directory.
- Active Window Only (Alt + PrtScn): Press Alt + PrtScn to capture only the active window, then paste it into a document or image editor with Ctrl + V.
Using Snip & Sketch Tool
The Snip & Sketch Tool is a modern replacement for the classic Snipping Tool in Windows, designed for flexible screenshot capturing with editing options.
- Open Snip & Sketch: Press Windows + Shift + S to launch the Snip & Sketch tool.
- Select Snip Type: A toolbar appears with options for rectangular, freeform, window, or full-screen snips.
- Take and Edit Screenshot: Capture the screenshot, and it will automatically open within Snip & Sketch, where you can edit and save the image.
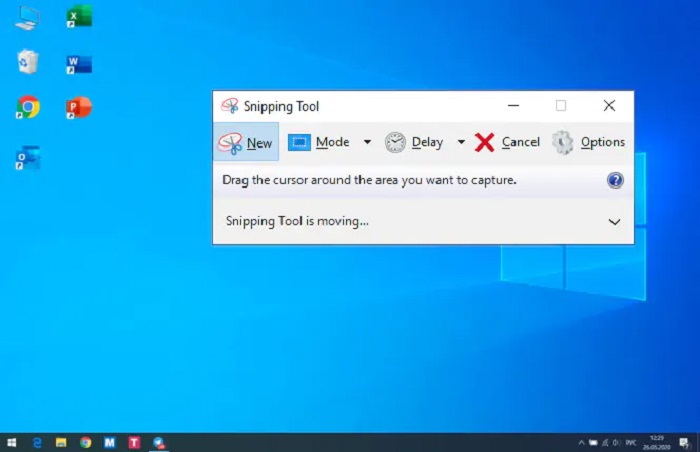
Using the Snipping Tool
The Snipping Tool is a classic tool available on most Windows versions, providing various screenshot options and limited editing features.
- Launch Snipping Tool: Search for “Snipping Tool” in the Start menu.
- Choose Your Snip Mode: Select from rectangular, freeform, window, or full-screen snip.
- Take and Save Screenshot: Once captured, you can annotate, save, or copy the image directly from the Snipping Tool interface.
Windows Game Bar
The Windows Game Bar is a tool designed for gamers but can be used by anyone to capture screenshots.
- Open Game Bar: Press Windows + G to open the Game Bar overlay.
- Take Screenshot: Click the camera icon or press Windows + Alt + PrtScn to capture a screenshot.
- Access Saved Screenshots: These are saved in the Captures folder under Videos by default.
Also Read: Travel Captions for Instagram
Screenshots on macOS Laptops
MacBooks come with built-in screenshot tools that allow for quick and efficient screen captures.
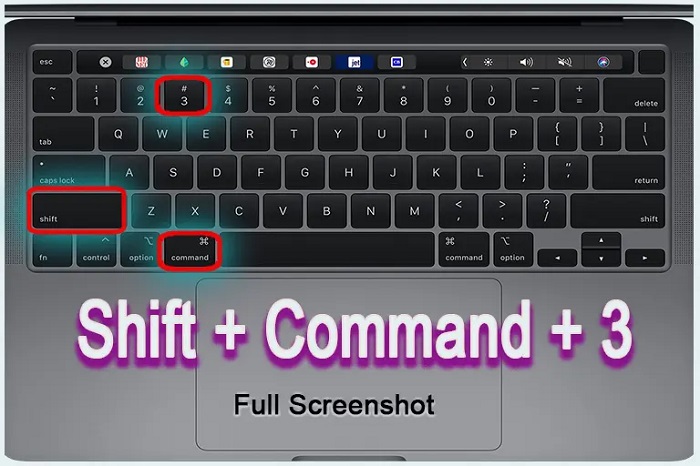
Command + Shift + 3
The Command + Shift + 3 shortcut is the simplest method for capturing the entire screen on macOS.
- Press Command + Shift + 3: This captures the entire screen and saves the file to your desktop.
- View and Edit: Double-click the image on your desktop to open it in Preview for editing.
Command + Shift + 4
This shortcut allows you to capture a specific area of the screen.
- Press Command + Shift + 4: A crosshair appears on your screen.
- Select an Area: Click and drag to select the area you want to capture.
- Save Automatically: The selected screenshot is saved to your desktop.
Additional Options with Command + Shift + 4
- Capture a Specific Window: After pressing Command + Shift + 4, hit the Spacebar, and a camera icon appears. Click the window you want to capture.
Command + Shift + 5
On macOS Mojave and later, Command + Shift + 5 opens a screenshot toolbar with various options.
- Press Command + Shift + 5: A toolbar appears at the bottom of your screen with options for capturing the entire screen, a selected window, or a portion of the screen.
- Screen Recording Option: This toolbar also allows for screen recording if you need to capture video.
- Edit and Save: After capturing, the file is saved to the desktop by default, but you can change this in the toolbar settings.
Third-Party Screenshot Tools

If built-in tools don’t meet your needs, third-party software can offer advanced options like screen annotations, instant sharing, and customized workflows.
Lightshot
Lightshot is a popular, free tool compatible with both Windows and macOS.
- Quick Capture and Editing: Lightshot allows instant editing after taking a screenshot.
- Easy Sharing: Lightshot provides sharing options via link, email, or social media.
Greenshot
Greenshot is another free tool designed for Windows with a range of editing and sharing options.
- Customizable Shortcuts: Greenshot allows you to set custom keyboard shortcuts for different types of screenshots.
- Annotation Tools: Add annotations directly after capturing for easy customization.
Snagit
Snagit is a premium tool offering advanced screen capture and recording options for professionals.
- Advanced Editing Features: Add arrows, shapes, text, and more to your screenshots.
- Screen Recording: Ideal for those who need both screenshots and screen recording capabilities.
FAQs About Taking Screenshots on Laptops
Where are my screenshots saved?For Windows, screenshots are usually saved in the Screenshots folder inside the Pictures directory.
Can I change the default save location for screenshots?Windows: You can move the Screenshots folder to another location.
How do I take a screenshot of a scrolling window?Third-party tools like Snagit and Greenshot offer scrolling capture options that aren’t available in the default Windows or macOS tools.
Knowing how to take a screenshot on your laptop opens up a world of convenience. Both Windows and macOS offer a range of built-in tools, shortcuts, and third-party options to tailor your screenshot experience to your needs. Whether you need a quick capture for a project, a tool to help you troubleshoot, or even a screenshot to help you document a process, there’s a solution for you.


